

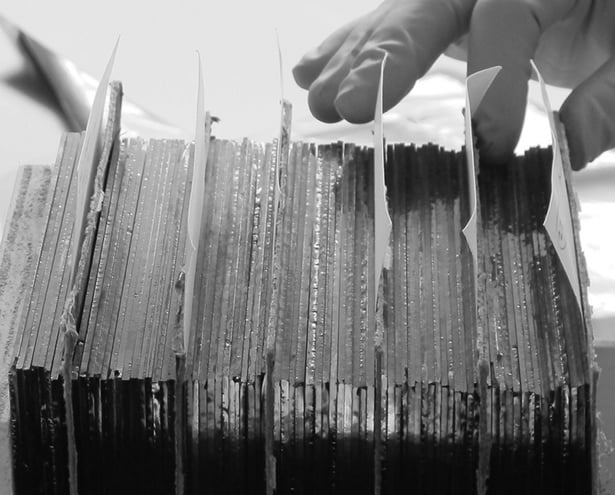
Glass plate negatives are one of the most fragile mediums that archivists and holders of special collections work with, so digitising glass plates requires a special level of care and attention.
Due to their extreme fragility, digitisation is often the only way to enable access to heritage glass plate negative collections, without putting them at risk. Consequently, we are frequently approached by archives and libraries, as well as private organisations, to scan their glass plate collections.
To help you better understand what’s involved when it comes to digitising glass plate negatives, we’ve combined our in house expertise, and years of industry experience, to create 10 Top Tips. These should help to explain the specific practices we follow to ensure top quality digitisation results, every time.
Digitising Glass Plate Negatives – 10 Best Practice Tips
1. Use a DSLR and Lightbox for image capture
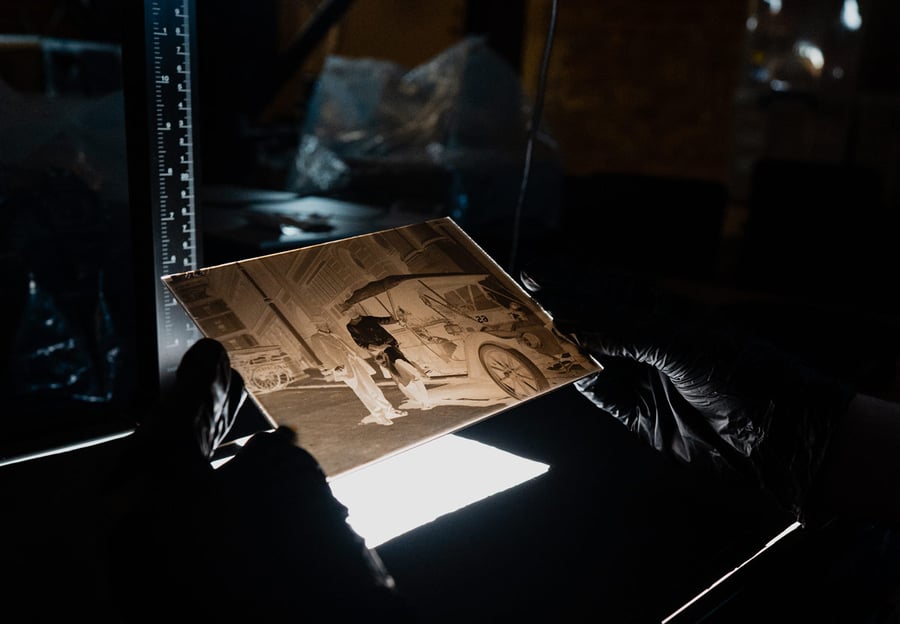
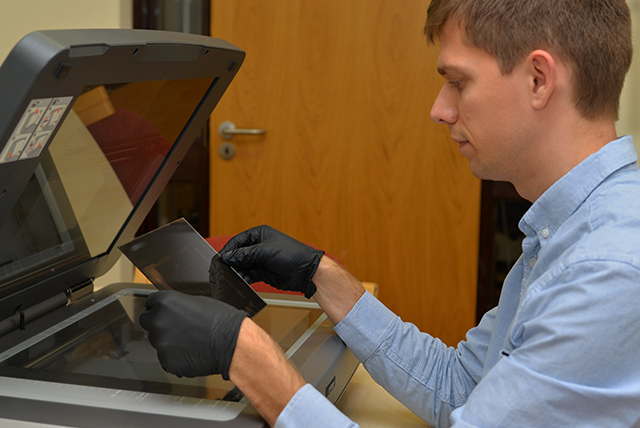
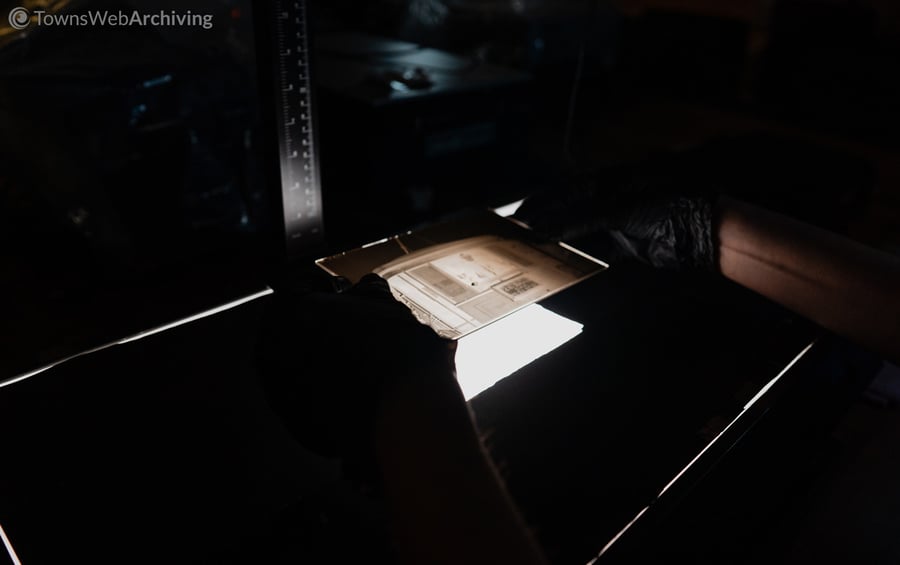
Whilst glass plate negatives can be digitised using a flatbed scanner (pictured below) and achieve good outputs, we believe that a DSLR camera and lightbox set-up (pictured above) produces the best image results. Of course, this is dependent on the model and spec of the scanner and camera being used. This type of setup also avoids pressure being applied to the plates by a scanner hood, which can cause them to snap due to age or the way they have been stored.
It is important, if you do choose to use a flatbed scanner to digitise your glass plate negatives, to ensure it is calibrated to the correct settings for the medium. This is often called “Transparency” mode but this varies between different models of scanner. Details of the relevant settings needed can usually be found in the user guide for your particular equipment or on the manufacturer’s website.
Personally, once we have scanned all of the plates we prefer to move the RAW files into Capture1 where we can calibrate the images manually, rather than relying on the scanner to auto calibrate.

2. Handle with gloves
When handling glass plate negatives and during the digitisation process (as well as in general) operators should always wear nitrile gloves. This is in line with National Archives Guidance. In addition to helping prevent contaminants (such as oils and acids from the skin) being transferred to the plates, wearing gloves also protects the operator’s hands from any sharp edges.
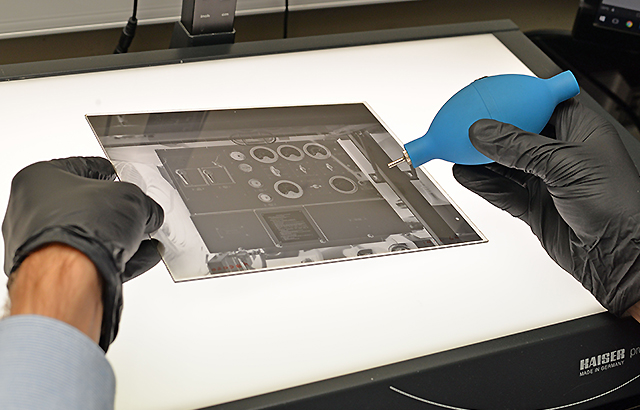
3. Clean plates before scanning
There may be tiny specs of dust and dirt that have collected on the surface of your glass plates, which can adversely affect the quality and clarity of the digitised images produced.
To remove the majority of this dirt the plates can be lightly dusted with a hand held bulb duster (air blower) prior to digitisation. However, it is important to consider the condition of the glass plates before dusting because, if the emulsion is deteriorating or flaking, dusting can damage the image.
4. Scanning - emulsion side up or down?
If using a DSLR and lightbox set-up to digitise your glass plates, we recommend placing them with the emulsion (matte) side facing upwards. This ensures the clearest capture, as the side bearing the image is closer to the camera lens, and it also reduces the risk of damage to the image on the plate, as there is no direct contact with it.
If using a flatbed scanner setup with a variable focus scanning head, we recommend placing the glass plates onto the scanner with the emulsion (matte) side facing down in order to obtain the clearest image. Scanning with the non-emulsion (shiny) side of the plate facing down can result in a slightly distorted image and increase the likelihood of Newton’s rings interference (discussed further on).
However, if you are using a fixed focus flatbed scanner to digitise your negatives, it is important to check the focus plane of your particular model and the manufacturer’s recommendations on how to place glass negatives on the scanner bed to achieve the best image result.
Regardless of which set-up you use, the resulting image produced can sometimes be the ‘wrong’ way around. This can easily be inverted using graphical software during post-processing, or even automatically at the point of scanning with some flatbed machines. It is important, however, to ensure that the software you use causes no loss in quality when inverting the image.
5. Protect the scanner bed
When using a flatbed scanner, the glass scanner bed and the glass plates themselves can easily be scratched. This can happen while placing and removing the plates or as a result of tiny particles of dirt and grit that may remain on the plates after cleaning. Both can negatively affect image quality. If using a scanner with a variable focus head, we recommend placing a transparent mylar or acetate sheet over the scanner bed to help prevent this from happening. This, together with taking care when placing plates onto the scanner, will protect both the scanner bed and the glass plates themselves from damage.
This technique can still be applied using a scanner with a fixed focus head, but may result in some minor loss of image quality due to the glass plate being further away from the scanner head than it would otherwise be.
6. Minimise pressure on the glass plates
If you are using a flatbed scanner, depending on the thickness of the glass plates being scanned and the depth of the bed of the scanner being used, there may be some pressure placed on the glass plates by the hood of the scanner during the digitisation process. This can potentially damage the plates. This risk can be mitigated by raising the hood of the scanner slightly (approx. 1-5mm is ideal). Some scanners allow the height of the hood when closed to be adjusted, but this can also be achieved by placing felt, foam, or cardboard strips around the edge of the scanner to cushion and elevate the lid slightly.
Not having the hood in contact with the glass plate also decreases the potential risk of the plate being inadvertently lifted up and dropped (due to the suction created by glass-on-glass) when the scanner hood is opened.
7. Watch out for ‘Newton’s Rings’
This only really applies to digitising glass plates with a flatbed scanner. In this environment the glass-on-glass contact between the plate and the scanner bed can create a pattern of distortion on the image, known as Newton’s Rings. Scanning emulsion (matte) side down, as we recommend above, goes some way to mitigating this risk. In addition, preventing the glass plate coming into direct contact with the scanner bed can help to avoid this phenomenon and can be achieved bu using a transparent mylar or acetate sheet (as described above).
8. Resolution, format & pixel depth
As standard, we recommend scanning glass plate negatives at a minimum resolution of 600ppi, depending on the size of the original plate, to uncompressed TIFF format as a master file. Compressed lower resolution surrogate JPEG files can then be produced from these master TIFFs.
We recommend digitising glass plate negatives at the highest pixel depth available, to capture as much tonal information as possible. However, this can be impractical due to large file sizes and longer scanning times (which, if outsourcing, can result in increased costs). We find that, for the majority of the organisations we work with, 16-bit pixel depth is ample for most glass plate digitisation projects.
9. Full colour vs greyscale image capture
Due to the nature of glass plate negatives, all of the images in the collections that we handle are in greyscale. Over time, as the emulsion coating on glass plates begin to deteriorate, the image on the plate can fade and discolour – turning yellow or brown. This alters the appearance of the plate and presents two choices:
Scan the plate in full colour, yellow and all, to preserve the truest representation of the archival object at that point in time;
OR
Scan the plate to greyscale (as it was originally produced) in order to partially restore its former appearance and take advantage of the greater image clarity this affords.
As always, the decision to capture in colour or greyscale should be made on the basis of the aims of the digitisation project. If the intent is simply to preserve the content of the glass plate collection and allow access to it digitally, then greyscale will likely provide the clearest and most useful images. However, if the purpose is to create a master archival image of the plate, then full colour may offer the truest representation of the artefact.
10. From negative to positive
The last stage of the digitisation process is to convert the master TIFF files that have been generated from negative to positive. This can be done automatically during scanning, with most models of flatbed scanner. However, if this isn’t an option, you can convert post-processing using a suitable graphics program (such as Adobe Photoshop) or Capture 1 software where you are scanning using a lightbox.
What Next?
We hope this blog proves helpful in understanding how to best digitise your collection of glass plate negatives and we wish you the best of luck with your project. However, should you prefer to outsource your digitisation project then take a look at the specialist services we offer below:
Digitisation
Our specialist digitisation equipment and scanning service is able to scan all of your glass plates and we have extensive experience in handling even the most delicate and fragile of items. We can scan your glass plates at high resolution, converting them to digital formats, including TIFF and JPEG files. Our consultants are always happy to discuss your requirements. Find out more about our digitisation services or contact us to discuss your individual requirements.
Data Capture
Digitisation provides the perfect opportunity to capture the valuable data contained within your glass plate collections and readies them for system integration and online access and discovery. Our handwritten transcription service, for example, can identify any handwritten or cursive script that might appear within your collection, converting this to searchable and machine readable textual metadata, outputting to any format.
PastView
Digitisation and Data Capture prime your glass plate collections for fluid integration into our PastView platform, enabling you to take advantage of a full range of features for enhanced online access and discovery, such as advanced search, featured collections, print facilities, and watermarking.
Are you looking to digitise your glass plate negatives?
Digitising old, fragile glass plate negatives and lantern slides is no problem for our accredited technicians. We hold years of experience scanning glass plates and understand the unique challenges they can present. Find out more.

 USE OUR ONLINE